
I. The Maintain Promotion screen allows you to put a Group, Product and/or in promotion for a given time frame:
The following screen will be displayed.
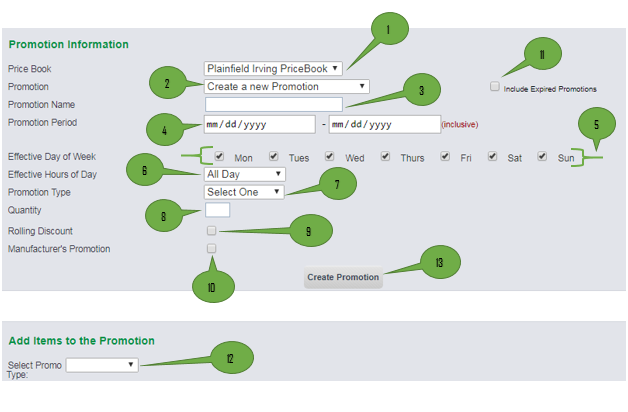
1. Price Book: Allows you to select the price book associated with your store.
2. Promotion: Create a new promotion or click on the drop down to see list of all active promotion.
3. Promotion Name:
- If you create a new promotion the name can be typed in here.
- If you select a promotion from the drop down, the name will show up here. You can edit the name if needed.
4. Promotion Period: Date on the left is the start date of the promotion:Date on the right is the end date of the promotion.

5. Effective Day of Week: All days are check marked by default. You can uncheck the day and the promotion will be inactive for that day.
6. Effective Hours of Day: Defaulted to All Day. You can choose the beginning and end time for the promotion selected.
![]()
7. Promotion Type: Select the promotion type.
- Fixed Price- The price for the promotion total. Ex. Buy 2 Gatorades for $5.00
![]()
- Discount Amount- The amount that will be discount from the promotion. Ex. Buy 2 Marlboro get $.50 off
![]()
- Discount Percent- The percentage (%) that will be taken of the promotion total. Ex. Get 10% off when you buy 3 Candy Bars.
![]()
8. Quantity: The number of items that qualify for the promotion.
9. Rolling Discounts: Select this check box only if you are enrolled in the Smokin’ Rebates program and your promotions include; Ex. Buy 2 or more and get ($.25 off) each one
10. Manufacturer’s Promotion: Select this check box only if you are enrolled in the Smokin’ Rebates program and are expecting rebate funds.
![]()
- Acct Funded Disc: If Any, put the amount of the promotion that is funded by the retailer.
- Mfr Exp Refund per deal: Put the amount the manufacture is expected to rebate the store per multi-pack promotion.
11. Include Expired Promotion: Select this check box to view all promotions, including promotion with expired date.
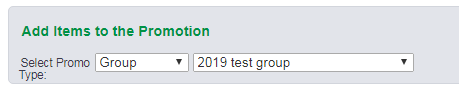
12. Add Items/Groups/Department to Promotions: Select Group, Product or Department then click create promotion. Will look like the example below and you can also add more items and/or groups to the existing promotion:
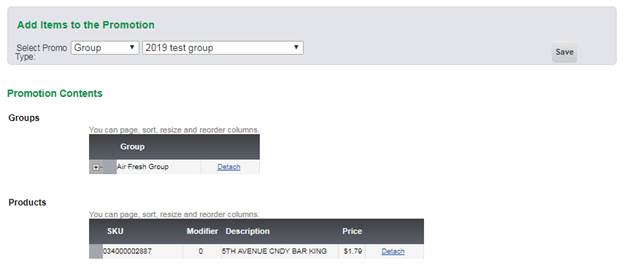
*** Select another Group, Product or Department and click Save to add on to the promotion.
13. Create Promotion: Click this button to create a promotion. The following items need be filled out before a promotion can be created. Message will be promoted if required sections are not filled out.
-Promotion Name
-Promotion Period
-Discount Type
-Price, Amt or Pct
-Quantity
-Group, Product or Department need to be selected. Ex:
II. Disabling or Ending Promotions:
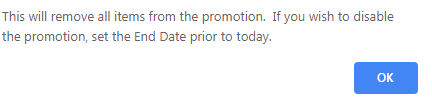
1. Do not detach any items from the active promotion. If you try and detach the last available Group, Product or Department, the following message will display:
2. To stop the promotion from being active on your register, change the end date on the promotion to date in the past. Ex. Today date is 02/06/2019, so change:
![]()
3. Click Update Promotion.
![]()
MaintainPromotion.aspx